
The revamped Magister’s Terrace in World of Warcraft: Midnight is widely regarded as the most challenging dungeon in the Season 1 Mythic+ pool, featuring Void-corrupted boss encounters that demand precise mechanic execution, strong interrupt rotations, and coordinated group positioning to overcome. Located on the Isle of Quel’Danas, the dungeon serves as a narrative bridge between the zone-level Void invasion content and the raid-tier confrontations with Dimensius’s most powerful lieutenants, and its mechanical complexity tests every aspect of a Mythic+ group’s preparation and skill. This complete strategy guide covers every boss encounter, trash pack composition, and strategic consideration for Magister’s Terrace on both Normal and high-key Mythic+ difficulty levels.

Dungeon Overview and Trash Pack Strategies
Magister’s Terrace in Midnight has been transformed from the classic Burning Crusade five-man dungeon into a Void-corrupted arcane research facility where the magisters’ experiments with Void energy have gone catastrophically wrong, allowing Void entities to invade the Terrace and corrupt both the facility’s arcane constructs and its former magister inhabitants. The dungeon features four boss encounters separated by dense trash pack corridors that require careful pulling, interrupt assignment, and crowd control coordination to clear efficiently without wiping.
The trash packs in Magister’s Terrace are among the most dangerous in the Season 1 Mythic+ pool due to their combination of hard-hitting melee Void constructs, Void-touched casters that must be interrupted on dangerous spell casts, and Void ground effects that restrict safe positioning space for the group. The following trash pack strategies will help your group clear the Terrace’s trash efficiently and safely.
- Void-Construct Packs: Packs featuring Void-corrupted arcane constructs (animated golems, mana elementals infused with Void energy) that deal heavy physical damage and must be tanked with strong active mitigation. These packs are straightforward tank-and-spank encounters but require the healer to maintain strong tank healing throughput while the DPS burns down the constructs one by one. Interrupts are not required for construct packs, allowing the group to focus interrupt assignments on the caster packs that follow.
- Void-Caster Packs: Packs featuring Void-touched magisters and Void priestesses who cast dangerous spells that must be interrupted, including Void Bolt (heavy single-target damage), Void Corruption (area damage-over-time that applies a healing reduction debuff), and Void Summon (summons additional Void adds that must be killed quickly). These packs are the most interrupt-dependent trash in the dungeon, and groups must assign specific casters to specific interruptors before pulling to ensure that no dangerous cast resolves.
- Mixed Packs: The most dangerous trash packs combine Void constructs and Void casters in the same pull, requiring the group to simultaneously manage heavy physical tank damage, interrupt caster spells, and control Void ground effects that limit safe positioning. Mixed packs are where most group wipes occur in Magister’s Terrace, and they should be pulled conservatively at high key levels with strong defensive cooldowns available to handle the combined damage intake.
- Arcane Tome Buff: Scattered throughout the dungeon are Arcane Tome interactable objects that provide a temporary damage and healing increase buff to players who interact with them. Groups should plan their pull routes to maximize Arcane Tome buff uptime during the largest and most dangerous trash packs, using the buff to accelerate clear speed and reduce the time the group is exposed to dangerous enemy damage.
At high Mythic+ key levels (+12 and above), many experienced groups employ trash skip strategies that use line-of-sight pulling, invisibility potions, and careful positioning to bypass the most dangerous trash packs and reach boss encounters more quickly. These skips require precise execution and knowledge of the dungeon’s line-of-sight geometry, and groups attempting skips for the first time should practice on lower keys where failed skips result in time loss but not necessarily dungeon failure.
Boss One: Arcanotron Custos
Arcanotron Custos is a Void-corrupted arcane guardian that was originally designed to protect the Magister’s Terrace research facility but has been twisted by Void energy into a hostile entity that attacks anyone entering the Terrace. The fight is a single-target tank-and-spank encounter with periodic Void energy discharge mechanics that require the group to reposition and manage area damage.
The boss’s primary mechanic is Void Discharge, an area-of-effect explosion centered on the boss that deals heavy damage to all players within 15 yards and leaves a Void ground effect in the discharge area that persists for 15 seconds and deals damage-over-time to players standing in it. The tank must reposition the boss after each Void Discharge to ensure the group has safe space to stand and DPS, and the group must spread out slightly to minimize the number of players hit by each discharge (ideally, only the tank should be within the discharge radius, because the tank’s active mitigation and the healer’s focused healing can manage the damage). The boss also casts Void Lance on random players, a single-target projectile that must be interrupted or soaked by a player with a strong defensive cooldown to prevent lethal damage on squishy DPS and healer targets.
The Arcanotron Custos fight is a gear check and healing throughput check that tests whether the group’s tank can survive heavy physical damage combined with Void Discharge and whether the healer can maintain group health through the periodic discharge damage. Groups that fail this boss typically lack sufficient tank active mitigation uptime or healer AoE healing output, and the solution is to improve gearing, consumable usage, and healing cooldown timing rather than to develop complex mechanical strategies.
Boss Two: Seranel Sunlash
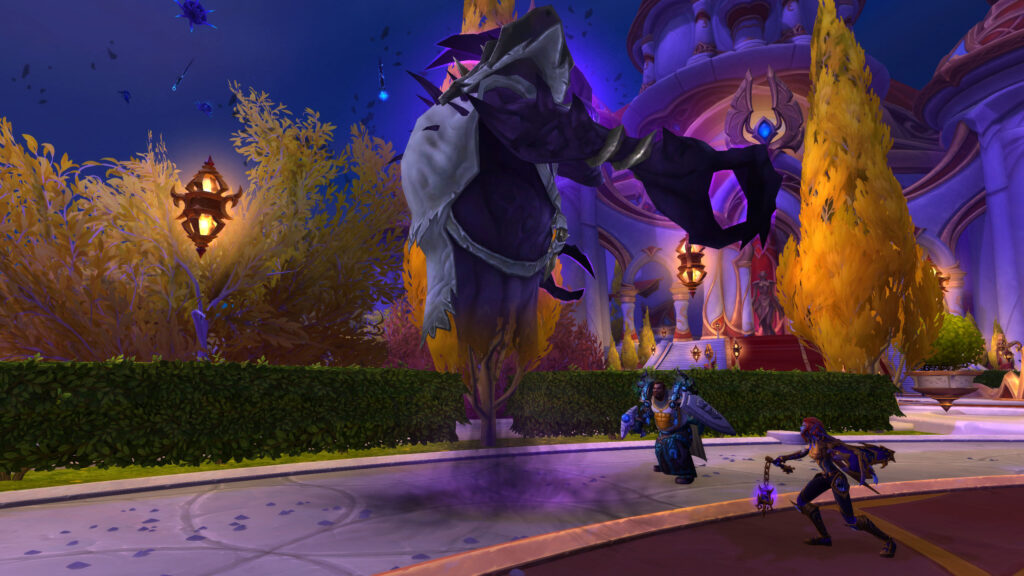
Seranel Sunlash is a Void-corrupted former magister who was the head of the Magister’s Terrace Void energy research program and is now the Void’s chief lieutenant within the facility. The fight is a multi-phase encounter that combines single-target boss damage with add management and Void mechanic navigation, making it significantly more complex than the Arcanotron Custos opener.
The fight begins with Seranel casting Void Barrier, a damage absorption shield that must be broken before the boss can be damaged. The Void Barrier is broken by attacking Void Crystals that spawn around the encounter area, each of which drops a Void Shard when defeated. Players who collect Void Shards gain the ability to damage Seranel’s Void Barrier, and the group must coordinate Shard collection and Barrier damage to break through efficiently. Once the Void Barrier is broken, Seranel becomes vulnerable to direct damage for approximately 30 seconds before recasting Void Barrier and requiring the group to repeat the crystal-shard-barrier cycle.
During the damage phase, Seranel casts Void Corruption on random players, a debuff that must be dispelled by a healer or cleansed by the affected player (if they have a cleanse ability) before it expires and deals raid-wide damage proportional to the number of stacks the debuff accumulated. Groups with multiple cleanse-capable players (healers with dispel, Paladins with Cleanse, Monks with Detox) should assign specific players to cleanse Void Corruption on specific group members to ensure the debuff is removed quickly and does not reach dangerous stack counts.
The Seranel Sunlash fight is the mechanical skill check of the Magister’s Terrace dungeon, and groups that struggle with this encounter should focus on improving their Void Crystal clearing speed, Void Shard collection efficiency, and Void Corruption cleanse timing. The fight rewards groups that execute the mechanic cycle cleanly and punishes groups that are slow to adapt to the spawning crystals and accumulating Corruption debuffs.
Boss Three: Gemellus
Gemellus is a twin Void entity that was summoned by the magisters’ Void experiments and has since consumed the researchers who originally controlled it. The Gemellus encounter features twin bosses that must be damaged simultaneously to prevent an enrage mechanic, adding a cleave/multi-target damage requirement to the dungeon that tests the group’s DPS composition and target-switching efficiency.
The twin bosses share a health pool linked by a Void Bond mechanic, and damage dealt to one twin is partially transferred to the other twin (approximately 30% of damage dealt to one twin is copied to the other). This shared health dynamic means that cleave-focused DPS specializations excel at the Gemellus encounter, because their cleave damage effectively damages both twins simultaneously even when they are only directly attacking one target. Single-target-focused DPS specs must actively switch between twins to ensure both are damaged evenly, because if one twin falls significantly behind in damage taken, the twins will cast Void Fusion, a raid-wide damage ability that becomes progressively more devastating with each cast and will eventually overwhelm the group’s healing throughput.
The twins also cast Void Step, teleporting to random positions around the encounter area and leaving Void ground effects at their previous locations that restrict safe DPS positioning. The tank must quickly re-taunt the twins after each Void Step to ensure both twins are tanked safely away from the group, and the group must reposition to avoid the accumulating Void ground effects while continuing to damage both twins evenly. The encounter area becomes progressively more constrained as the fight progresses, and the final damage push must be executed in a small safe zone surrounded by Void ground effects, testing the group’s ability to execute under positional pressure.
Groups with strong cleave DPS (Balance Druid, Havoc Demon Hunter, Fury Warrior, Unholy Death Knight) will find the Gemellus encounter significantly easier than groups composed entirely of single-target DPS, because the cleave specs’ natural damage profile aligns with the encounter’s twin-damage requirement. If your group is struggling with Gemellus, consider substituting a single-target DPS spec for a cleave-focused spec to take advantage of the encounter’s multi-target damage dynamics.
Boss Four: Degentrius — The Final Encounter

Degentrius is the most powerful Void entity within the Magister’s Terrace and serves as the dungeon’s final boss encounter, combining mechanics from the previous three bosses into a climactic fight that tests every aspect of the group’s mechanical execution, damage output, and healing throughput. Degentrius is the encounter that defines Magister’s Terrace as the hardest dungeon in the Season 1 Mythic+ pool, and groups that clear this boss successfully demonstrate a level of coordination and skill that is necessary for pushing the highest keys in the seasonal dungeon rotation.
Degentrius cycles through three phases, each modeled after one of the previous three bosses: Phase One replicates the Void Discharge mechanic from Arcanotron Custos, requiring tank repositioning and group awareness of area damage zones. Phase Two replicates the Void Barrier and Void Shard mechanic from Seranel Sunlash, requiring the group to clear Void Crystals, collect Shards, and break the Barrier before dealing direct damage. Phase Three replicates the twin-damage requirement from Gemellus, as Degentrius splits into two Void entities that must be damaged simultaneously to prevent the escalating Void Fusion raid-wide damage.
Each phase transition is triggered by Degentrius reaching specific health thresholds (Phase One ends at 66%, Phase Two ends at 33%, Phase Three continues to zero), and the transitions themselves deal raid-wide damage that the healer must prepare for with defensive cooldowns and healing throughput ramps. The healer’s role in the Degentrius encounter is the most demanding of any boss in the Magister’s Terrace dungeon, because the healer must manage three distinct mechanic sets, phase transition damage spikes, and the accumulating positional pressure from Void ground effects that fill the encounter area as the fight progresses.
Groups that successfully defeat Degentrius and complete the Magister’s Terrace dungeon on high Mythic+ keys have accomplished one of the most challenging dungeon clearances in the Season 1 pool, and the Great Vault rewards from a timed Magister’s Terrace run are among the best available in the Midnight expansion. The dungeon’s mechanical complexity, interrupt dependence, and cleave damage requirements make it a comprehensive test of Mythic+ group competence, and clearing it is a badge of honor that signals your group’s readiness for the highest key levels and the most demanding content that World of Warcraft: Midnight has to offer.
Leave a Reply